Create Project
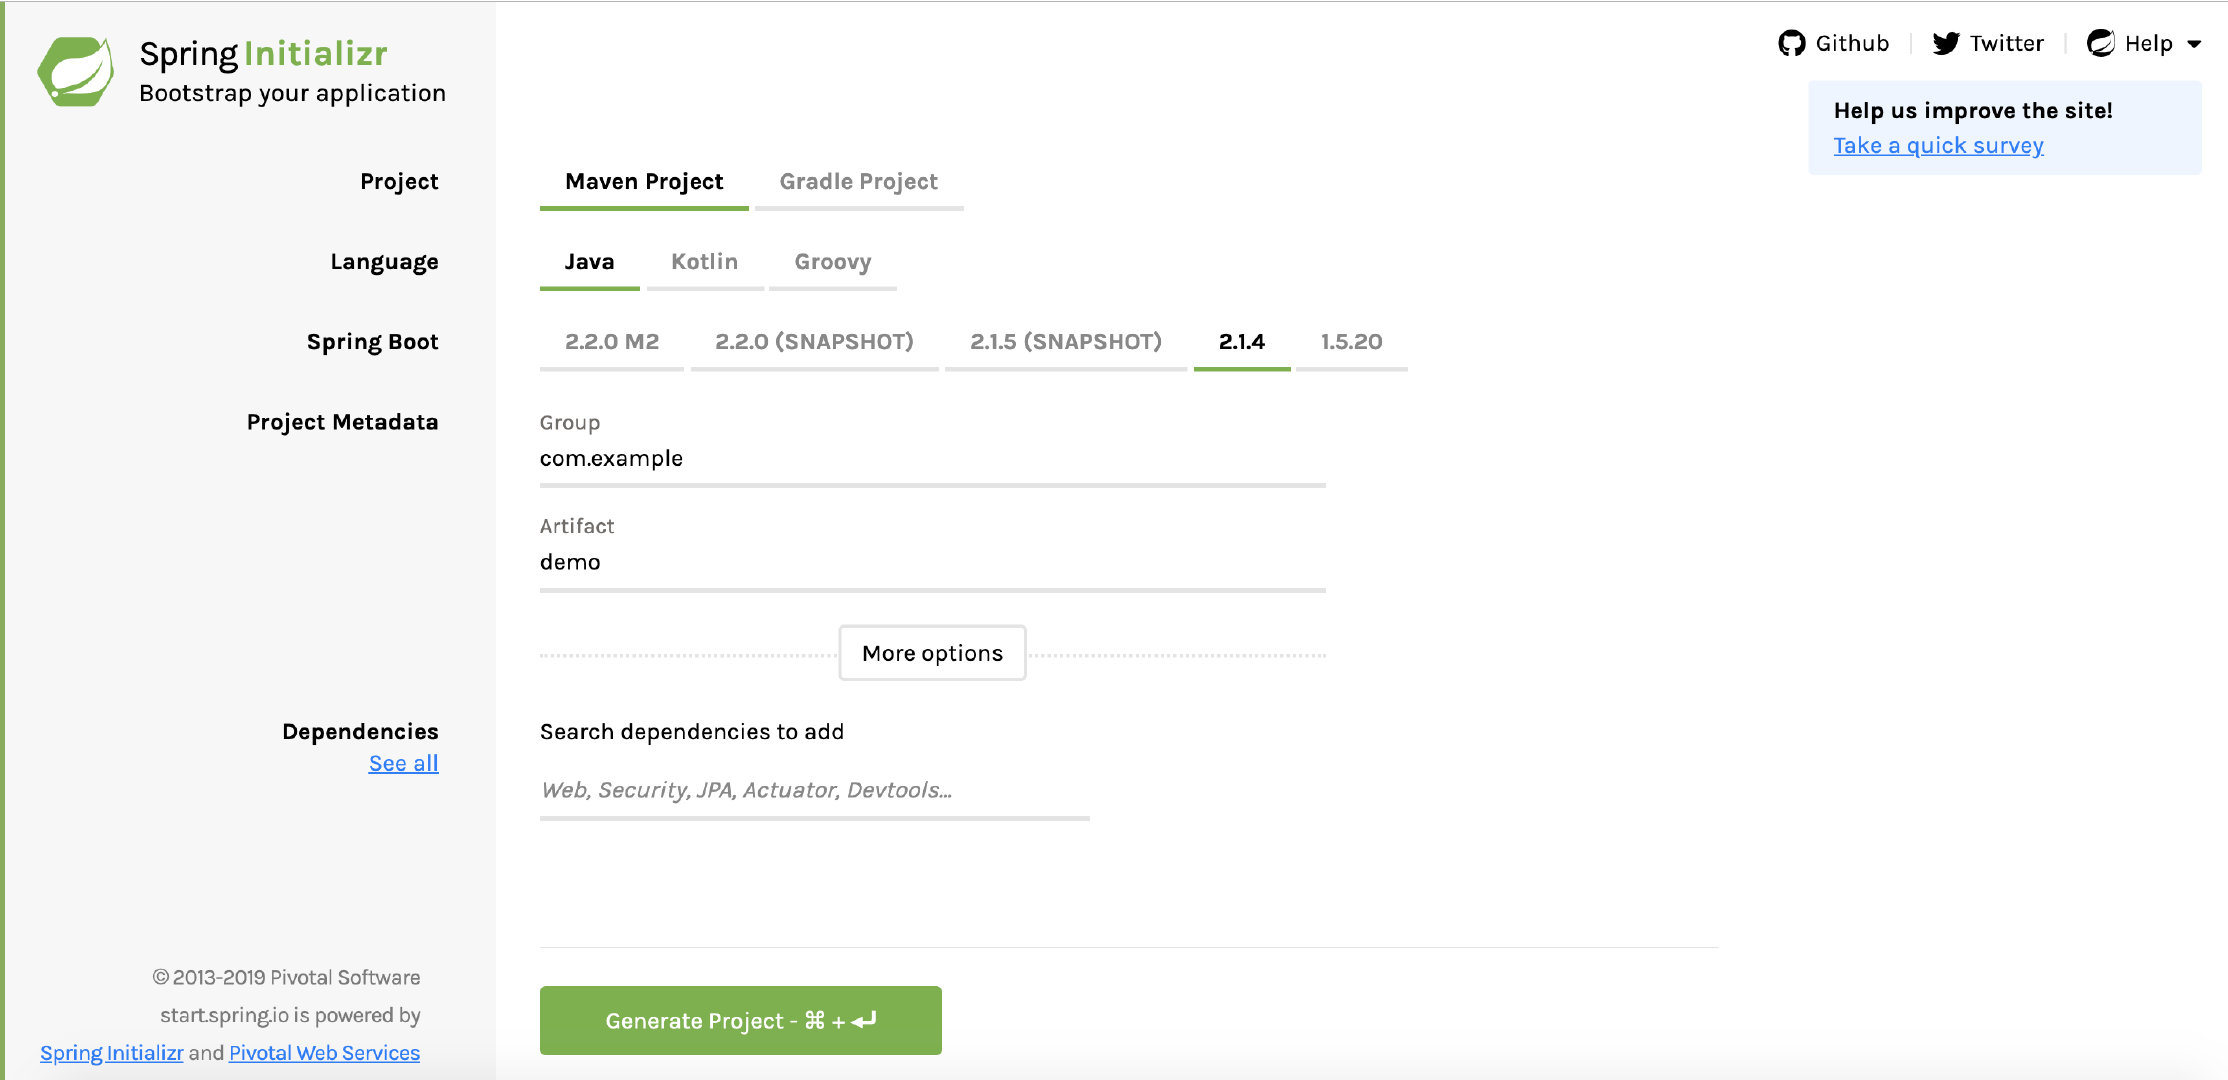
构建一个Spring Boot的项目非常方面,可以使用官方提供的Spring Initializr,打开https://start.spring.io/,输入项目基本信息即可构建一个项目

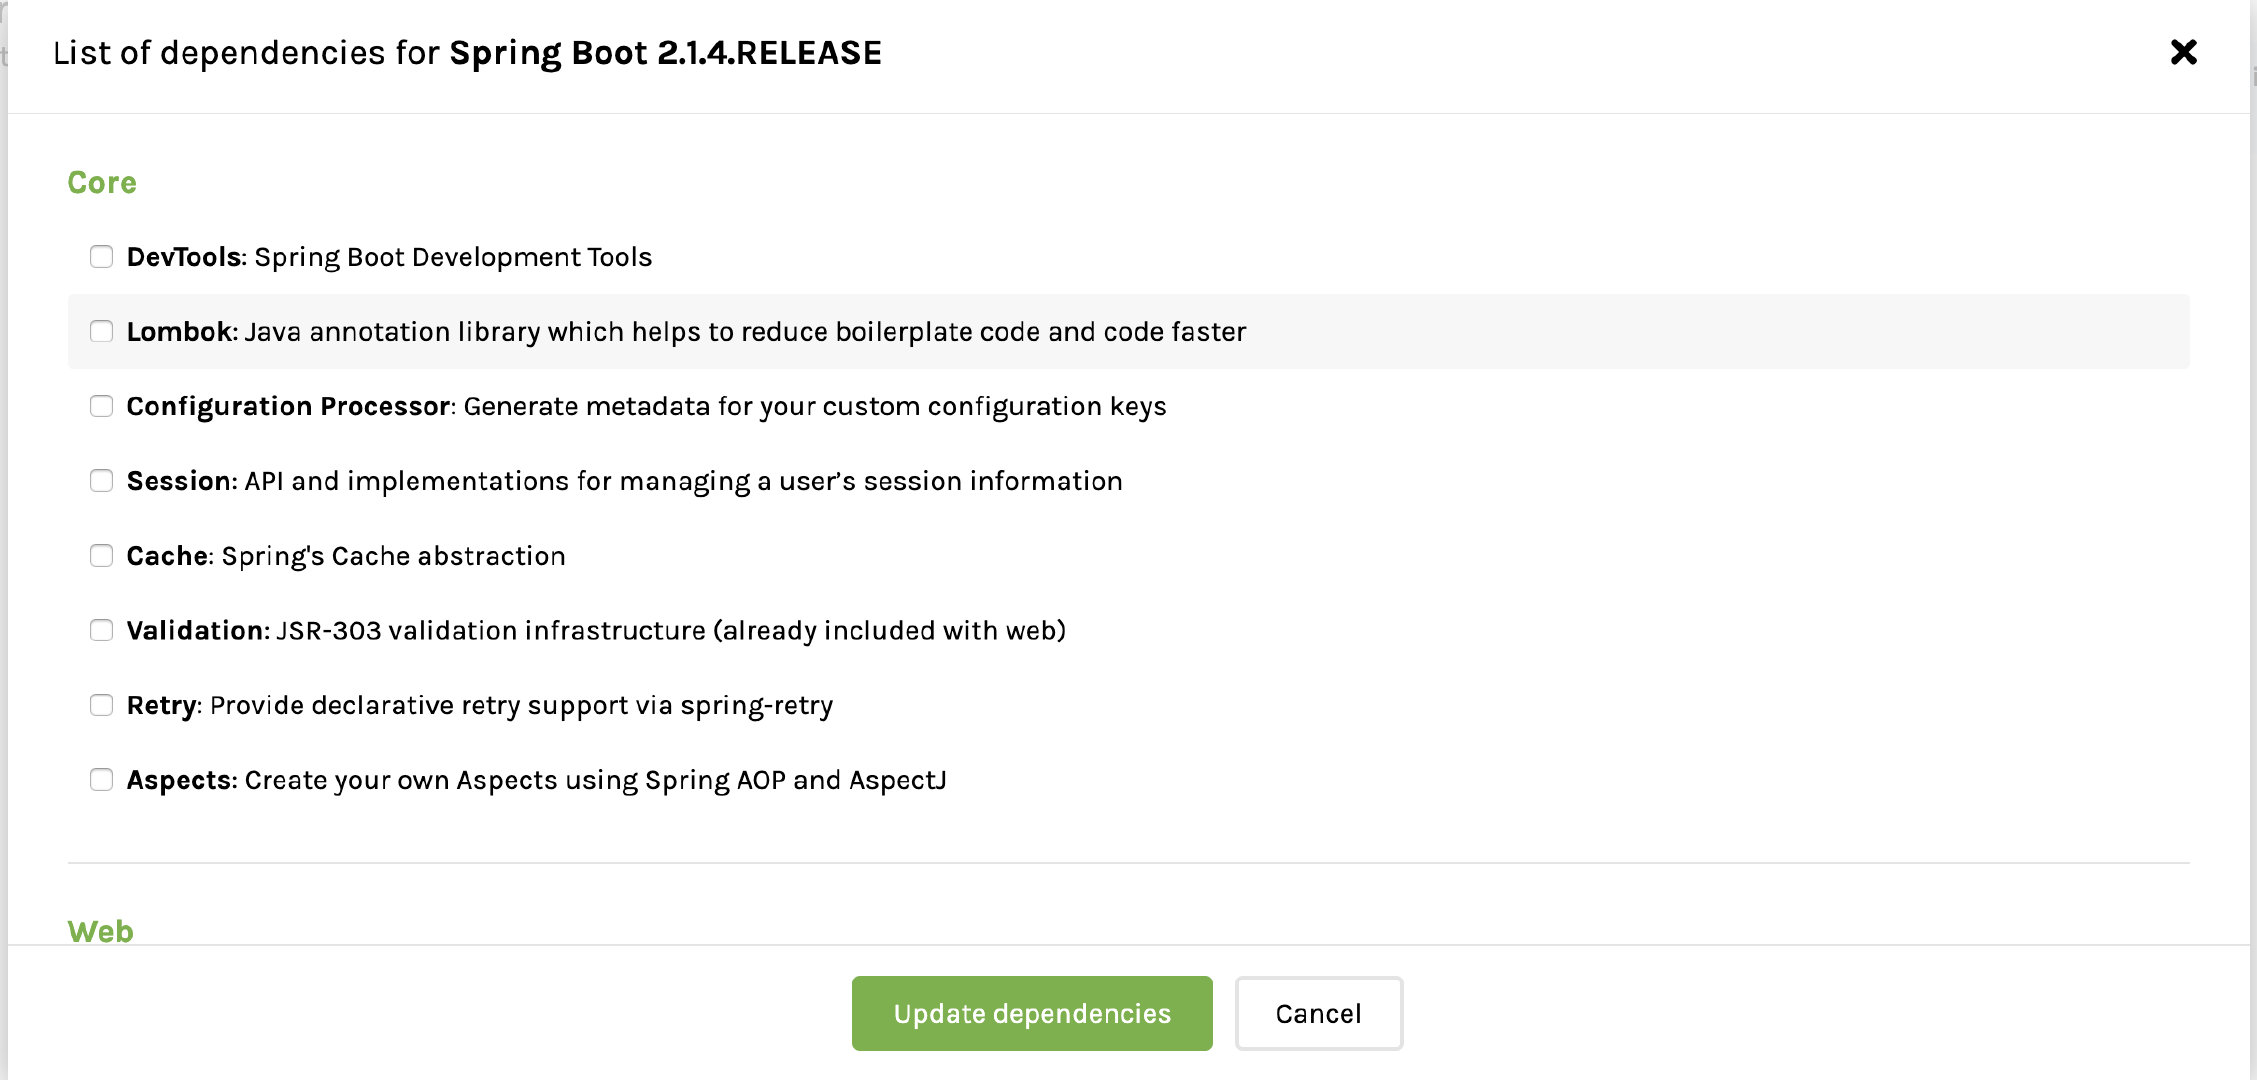
另外你还可以设置需要引入的依赖,点击set all,即可以选择需要引用的依赖

最后点击生成,即可以得到一个压缩包,解压缩之后便可以得到一个Spring Boot项目
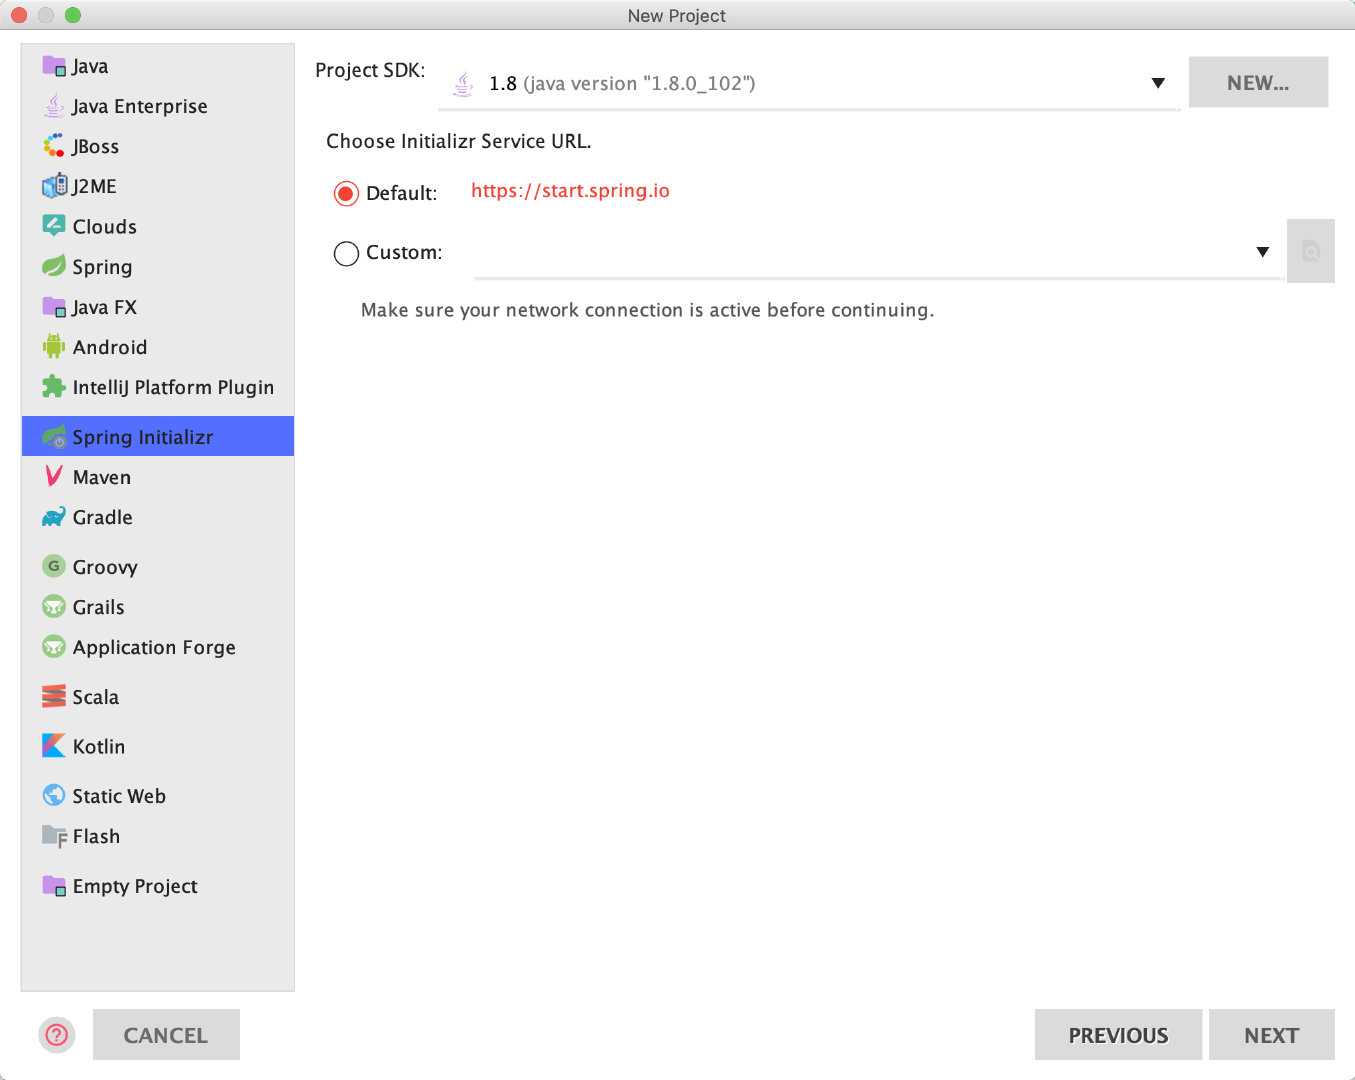
如果你是用的IDEA,则IDEA内置了Spring Initializer,按照提示可以方便构建项目

Maven Install
下面来看下如何使用maven来构建Spring boot项目。
利用maven来构建Spring boot 项目有两种方式
- 继承spring-boot-starter-parent,使用Spring Initializer构建的项目都是采用这种方式
- import Spring-boot的pom文件
下面看下以上两种方式pom文件的配置
inherits spring-boot-starter-parent
<?xml version="1.0" encoding="UTF-8"?>
<project xmlns="http://maven.apache.org/POM/4.0.0" xmlns:xsi="http://www.w3.org/2001/XMLSchema-instance"
    xsi:schemaLocation="http://maven.apache.org/POM/4.0.0 https://maven.apache.org/xsd/maven-4.0.0.xsd">
    <modelVersion>4.0.0</modelVersion>

    <groupId>com.example</groupId>
    <artifactId>myproject</artifactId>
    <version>0.0.1-SNAPSHOT</version>

    <!-- Inherit defaults from Spring Boot -->
    <parent>
        <groupId>org.springframework.boot</groupId>
        <artifactId>spring-boot-starter-parent</artifactId>
        <version>2.1.4.RELEASE</version>
    </parent>

</project>
import Spring-boot pom
<?xml version="1.0" encoding="UTF-8"?>
<project xmlns="http://maven.apache.org/POM/4.0.0" xmlns:xsi="http://www.w3.org/2001/XMLSchema-instance"
    xsi:schemaLocation="http://maven.apache.org/POM/4.0.0 https://maven.apache.org/xsd/maven-4.0.0.xsd">
    <modelVersion>4.0.0</modelVersion>

    <groupId>com.example</groupId>
    <artifactId>myproject</artifactId>
    <version>0.0.1-SNAPSHOT</version>

    <dependencyManagement>
        <dependencies>
            <dependency>
                <!-- Import dependency management from Spring Boot -->
                <groupId>org.springframework.boot</groupId>
                <artifactId>spring-boot-dependencies</artifactId>
                <version>2.1.4.RELEASE</version>
                <type>pom</type>
                <scope>import</scope>
            </dependency>
        </dependencies>
    </dependencyManagement>

</project>
Install Application
下面以一个web服务为例,描述如何启动一个Spring Boot项目
首先生成一个Application类,Spring Boot的入口类
@SpringBootApplication
public class Application{
    public static void main(String[] args) {
        SpringApplication.run(Application.class,args);
    }
}
@SpringBootApplication等价于@Configuration,@EnableAutoConfiguration,@ComponentScan三者合一
第二步就是生成一个Controller
@RestController
public class DemoController {

    @RequestMapping("/")
    public String helloWorld() {
        return "Hello World";
    }
}
@RestController注解用来告知Spring这是一个Restful的web Controller
@RequestMapping注解提供路由信息
下面就是启动项目了,首先需要在pom文件加入如下build插件,此时插件将生成一个可执行的jar
<build>
    <plugins>
        <plugin>
            <groupId>org.springframework.boot</groupId>
            <artifactId>spring-boot-maven-plugin</artifactId>
        </plugin>
    </plugins>
</build>
之后运行maven命令,即可以得到jar
mvn clean install
得到可执行jar后,有两种启动方式
- 直接运行jar
- 以Unix service的方式运行
start with jar
直接运行jar比较简单,直接输入一下命令即可以
java -jar target/springbootDemo.jar
start with Unix Service
首先需要创建一个系统链接
sudo ln -s /www/demo/springbootDemo.jar /etc/init.d/myapp
此时,即可以启动项目
service springbootDemo start
运行成功之后,可以发现/var/run/springbootDemo/springbootDemo.pid这个文件,如果你想配置项目的相关配置,可以在jar的目录下,配置.conf的配置文件,例如
springbootDemo.conf

LOG_FOLDER=/www/demo/log   //日志路径
JAVA_OPTS="-Dfile.encoding=UTF-8 -Dspring.profiles.active=dev"
Spring Active Profile
在实际的开发中,需要区分不同的部署环境,不同环境的配置是不一样的,例如dev,pre,pro环境,那么如何管理这些配置文件呢?
Spring Boot默认会去寻找application.properties或者application.yml文件来作为配置文件,我们可以通过spring.profiles.active参数来指定加载对应的配置文件,例如
java -jar -Dspring.profiles.active=dev springbootDemo.jar
则Spring Boot会去加载文件名为application-dev的配置文件
###@ActiveProfiles
在单元测试中,我们又可能需要加载配置文件,此时可以通过@ActiveProfiles注解来指定加载的配置文件
@ActiveProfiles("local")
注意@ActiveProfiles只能在/src/test/java中使用
###@Profiles
@Profile声明的类,必须提供满足value属性中指定的条件,才会被注册到Spring容器中,例如
@Profile("dev")
@RestController
@RequestMapping("/test")
public class TestController {

    @GetMapping("/greet")
    public String greet() {
        return "Hey there!";
    }

}
如果指定spring.profiles.active=pro,则 TestController则不会被加载到Spring容器中


