Spring Boot支持使用redis作为cache缓存,下面会详细介绍具体的用法
maven 依赖
    <dependency>
        <groupId>org.springframework.boot</groupId>
        <artifactId>spring-boot-starter-data-redis</artifactId>
    </dependency>

    <dependency>
        <groupId>org.springframework.boot</groupId>
        <artifactId>spring-boot-starter-cache</artifactId>
    </dependency>
简单示例
在使用redis作为cache之前,首先需要在Application中增加注解@EnableCaching
@SpringBootApplication
@EnableCaching
public class Application{
    public static void main(String[] args) {
        SpringApplication springApplication = new SpringApplication(Application.class);
        springApplication.run(args);
    }
}
使用@Cacheable注解来表示使用cache
@Slf4j
@Service
public class CacheService {

    @Cacheable(cacheNames = "myCache")
    public String cacheThis(){
        log.info("Returning NOT from cache!");
        return "this Is it";
    }
}
测试下cache的效果
@Test
public void run() throws Exception {
    String firstString = cacheService.cacheThis();
    log.info("First: {}", firstString);
    String secondString = cacheService.cacheThis();
    log.info("Second: {}", secondString)
}
在测试之前需要启动本地的redis,因为spring boot会将cache的值保持在redis中
spring.redis.host=localhost
spring.redis.port=6379
运行测试用例可以看到如下结果
此时连接到redis上,可以看到刚刚创建的cache
redis-cli
127.0.0.1:6379> keys *
myCache::SimpleKey []
127.0.0.1:6379> get "myCache::SimpleKey []"
"\xac\xed\x00\x05t\x00\nthis is it"
我们发现value的值有乱码,这个问题我们先放下,在后面会详细说明
通过上诉的例子,我们简单地了解了spring boot如何整合redis作为cache
Cache的写入与读取
@Cacheable
根据方法的请求参数对其结果进行缓存,如果缓存存在,则直接返回缓存结果,如果不存在,则执行实际的方法。
| name | explain |
|---|---|
| cacheName | cache的名称 |
| value | cacheName的别名,也表示cache的名称 |
| key | 可以用spel表示式,对应redis中key |
| keyGenerator | 对应于生成key的bean |
| condition | 可以用spel表达式,当返回为true时,则进行缓存 |
| unless | 可以用spel表达式,当返回为true时,则不进行缓存 |
/**
* 当参数的长度大于3时才进行缓存,并且key的格式为参数加上后缀_condition
**/
     @Cacheable(cacheNames = "cache1",condition = "#value.length() > 3",key = "#value.concat('_condition')")
    public String cacheCondition(String value){
        return "test cache condition";
    }

    @Override
    public void run(String... args) throws Exception {
        // 参数长度小于3,不进行缓存
        cacheService.cacheCondition("a");
        // 参数长度大于3,进行缓存,且key为test_condition
        cacheService.cacheCondition("test");
    }
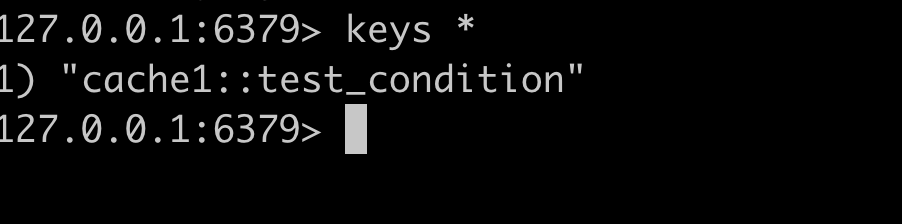
运行上述例子,可以看到redis的key只有一个
@CachePut
根据方法的请求参数对其结果进行缓存,和 @Cacheable 不同的是,它每次都会触发真实方法的调用
    @CachePut(cacheNames = "cache2",key = "#value")
    public String cachePut(String value){
        log.info("Returning NOT from cache!");
        return value;
    }

    @Override
    public void run(String... args) throws Exception {
        cacheService.cachePut("a");
        cacheService.cachePut("b");
    }
运行上述例子,可以看到Returning NOT from cache!打印了两次,表示@CachePut不会使用缓存结果,每次都重新生成缓存值
清除Cache
@CacheEvict可以根据一定的条件清空缓存
    @CacheEvict(cacheNames = "cache2", key = "#value")
    public void cacheEvict(String value){
    }

    @Override
    public void run(String... args) throws Exception {
        cacheService.cacheEvict("a");
    }
在运行示例前,redis中存在的key如下

执行完毕后,a的缓存被清空,redis中存在的key如下

Cache key的管理
spring boot默认生成的cache key一般的比较长,也不好理解,所以一般我们都会自己定义cache key的生成。
cache相关的注解中,都有两个参数key,keyGenerator,都可以用来控制cache key的生成
key使用spel表示式
 public String getCacheKey(String key){
        return "my_cache_" + key;
    }

    //从getCacheKey方法中获取key
    @Cacheable(cacheNames = "myCache", key = "cacheService.getCacheKey('test')")
    public String cacheThis(){
        log.info("Returning NOT from cache!");
        return "this is it";
    }
keyGenerator对应于实现了org.springframework.cache.interceptor.KeyGenerator的bean
public interface KeyGenerator {

    /**
     * Generate a key for the given method and its parameters.
     * @param target the target instance
     * @param method the method being called
     * @param params the method parameters (with any var-args expanded)
     * @return a generated key
     */
    Object generate(Object target, Method method, Object... params);

}
@Service
public class MyCacheKeyGenerator implements KeyGenerator {
    @Override
    public Object generate(Object target, Method method, Object... params) {
        //若参数不为空,则将第一个参数作为key
        return params == null ? "[]": params[0];
    }
}

@Cacheable(cacheNames = "cache4",keyGenerator = "myCacheKeyGenerator")
public String keyGeneratorCache(String value){
    return value;
}

@Override
public void run(String... args) throws Exception {
    cacheService.keyGeneratorCache("bbbb");
}
运行上述示例可以redis生成了如下的key
127.0.0.1:6379> keys *
1) "cache4::bbbb"
过期时间
每一个cache可以设置一个过期时间,同时也可以设置一个全局的过期时间,即默认的过期时间
- cache配置
@ConfigurationProperties(prefix = "cache")
@Data
public class CacheConfigurationProperties {
    private long timeoutSeconds = 60;
    private int redisPort = 6379;
    private String redisHost = "localhost";
    /**
     * key: cache 名称
     * value:过期时间,单位为秒
     */
    private Map<String, Long> cacheExpirations = new HashMap<>();
}
@ConfigurationProperties(prefix = “cache”)表示从配置文件中读取前缀为cache的配置。cacheExpirations可以保存每一个cache的过期时间
- 根据property生成对应的cache配置
@Configuration
@EnableConfigurationProperties(CacheConfigurationProperties.class)
public class CacheConfig extends CachingConfigurerSupport {

    /**
     * 生成RedisCacheConfiguration,并设置过期时间
     * @param timeoutInSeconds 过期时间
     * @return
     */
    private static RedisCacheConfiguration createCacheConfiguration(long timeoutInSeconds) {
        return RedisCacheConfiguration.defaultCacheConfig()
                .entryTtl(Duration.ofSeconds(timeoutInSeconds))
                .serializeValuesWith(RedisSerializationContext.SerializationPair.fromSerializer(new StringRedisSerializer()));
    }

    /**
     * 根据配置生成RedisCacheConfiguration
     * @param properties cache配置
     * @return
     */
    @Bean
    public RedisCacheConfiguration cacheConfiguration(CacheConfigurationProperties properties) {
        return createCacheConfiguration(properties.getTimeoutSeconds());
    }

    @Bean
    public RedisTemplate<String, String> redisTemplate(RedisConnectionFactory cf) {
        RedisTemplate<String, String> redisTemplate = new RedisTemplate<String, String>();
        redisTemplate.setConnectionFactory(cf);
        redisTemplate.setKeySerializer(new StringRedisSerializer());
        redisTemplate.setValueSerializer(new StringRedisSerializer());
        return redisTemplate;
    }

    /**
     * 根据配置生成CacheManager
     * @param redisConnectionFactory redis连接配置
     * @param properties cache配置文件
     * @return
     */
    @Bean
    public CacheManager cacheManager(RedisConnectionFactory redisConnectionFactory, CacheConfigurationProperties properties) {
        Map<String, RedisCacheConfiguration> cacheConfigurations = new HashMap<>();

        /**
         * 从配置文件中读取每一个cache的过期时间,并生成对应的RedisCacheConfiguration
         */
        for (Map.Entry<String, Long> cacheNameAndTimeout : properties.getCacheExpirations().entrySet()) {
            cacheConfigurations.put(cacheNameAndTimeout.getKey(), createCacheConfiguration(cacheNameAndTimeout.getValue()));
        }

        return RedisCacheManager
                .builder(redisConnectionFactory)
                .cacheDefaults(cacheConfiguration(properties))
                .withInitialCacheConfigurations(cacheConfigurations).build();
    }
}
- 在property文件中设置过期时间
#默认过期时间
cache.timeoutSeconds=60
#cache名称为cache5的过期时间
cache.cacheExpirations.cache5=180
- 测试
@Cacheable(cacheNames = "cache5")
public String expireTimeCache(String value){
    return value;
}

 @Override
public void run(String... args) throws Exception {
    cacheService.keyGeneratorCache("bbbb");
    cacheService.expireTimeCache("eeee");
}
运行上述示例,可以看到redis中有两个key
127.0.0.1:6379> keys *
1) "cache5::eeee"
2) "cache4::bbbb"

127.0.0.1:6379> ttl cache5::eeee
(integer) 173
127.0.0.1:6379> ttl cache4::bbbb
(integer) 49
其中cache5::eeee的过期时间为180,而cache4::bbbb的过期时间为60
关于乱码
在最初的示例中,value的值总会出现乱码,这是因为cache value默认的序列化策略为SerializationPair
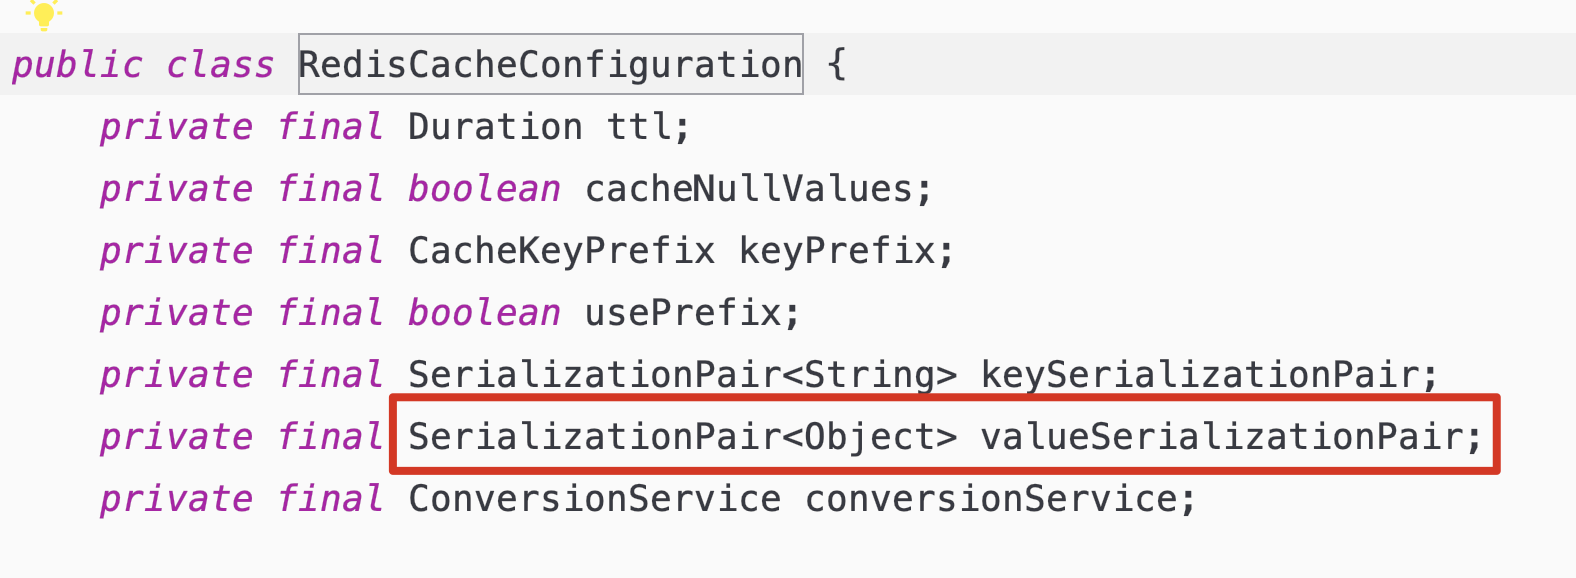
为了解决乱码问题,只需要自己指定相应的序列化策略即可
private static RedisCacheConfiguration createCacheConfiguration(long timeoutInSeconds) {
        return RedisCacheConfiguration.defaultCacheConfig()
                .entryTtl(Duration.ofSeconds(timeoutInSeconds))
                // 指定value的序列化策略
                .serializeValuesWith(RedisSerializationContext.SerializationPair.fromSerializer(new StringRedisSerializer()));
    }